
How to use a System Image to migrate to a new Drive (Windows 7 Backup)
I recently installed an Intel 520 series SSD in my Dell M4700 laptop. Since I did not want to have to reinstall Windows 7 and setup all my programs again, I decided to use the Backup feature built into Windows 7 Professional which lets you take a 'System Image'. My thinking is that I can save a lot of time and hassle by simply imaging my system as-is and restoring it on the new drive.
This sounds wonderful in theory, but in practice there are a few gotchas that can creep up along the way. This article will explain how to successfully migrate from an HD -> SSD using the 'System Image' feature of Windows Backup.
Useful bits of information from my journey
- Windows 7 does not create a valid 'Restore' Disc if you have a GPT / UEFI install
- If you have a Legacy / MBR install of Windows 7, you will not be able to use a System Image to restore to a UEFI / GPT drive (I tried, it doesn't work)
- For Windows Backup to 'restore' a System Image, you must Install windows onto the new drive and give the computer the same name as captured in the System Image
- Depending on the model of Intel 520 SSD you acquire (In my case: SSDSC2CW240A3K5 ), you shouldn't remove the plastic spacer that comes installed to the 'top' of the drive
- The Dell M4700 supports 2.5", 9.5mm thick SSDs and HDs
Steps to a successful migration
These steps are the end-result of a 6 hour journey through the Windows Backup and restore system. Hopefully they can be of service to you on your journey. Lets get started:
Phase 1: Preparation and Taking the Image
- Very important step: If you are moving to a Smaller drive than your original drive, resize the drive using the Windows Disk Management Console. To do this:
- Right click on Computer and select Manage
- Under the Computer Management Sidebar expand Storage and click on Disk Management
- Find your System Disk (Most likely disk 0, but be careful here) then Right-Click on the OS partition and select Shrink Volume...

- Follow the Wizard and shrink your drive down as far as it will go
- Make sure that the resulting size of all partitions on the disk are Smaller than the drive you will be migrating to. In my case I was moving from a 320GB HD to a 240GB SSD and the default 'shrink' options worked for me. You may need to defrag your disk or migrate some files for this to work for you
- Make sure you have the System Media that comes with your Laptop/desktop handy. Verify that your disc of choice will actually boot your system. Don't just assume it will work!
- Plug in a USB Hard drive --or-- make sure you have enough DVDs lying around to create a System Image of your Hard drive
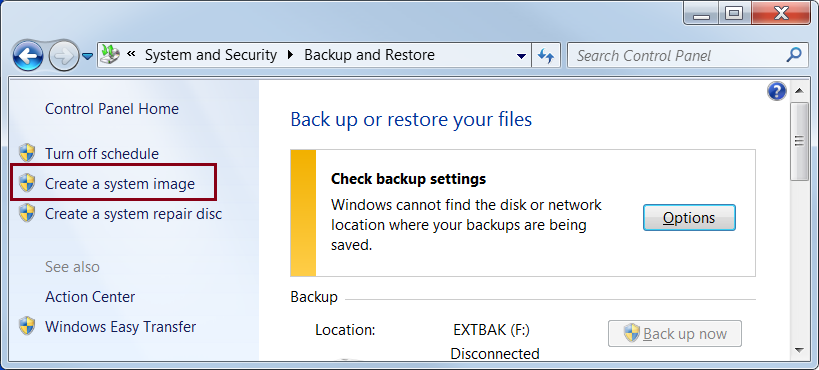
- Open the Windows Control Panel and go to System and Security -> Backup and Restore
- Click on the Create a System Image link in the sidebar
- Follow the wizard to create an Image of your boot drive to your chosen backup medium (I recommend the hard drive if you have one lying around- makes the process quicker and less error prone)
- When this process finishes you will be asked if you want to create a System repair disc. You may want to do this before going further (Be sure to validate you can boot from the resulting disc before continuing)
Phase 2: Install the new Drive and restore the System Image backup
In my case I was upgrading a laptop Hard drive, so I had to replace rather than add the new drive. Your case may be a bit different. If so, use my steps here as 'guidelines'
- Boot your computer with the System restore / install discs or USB stick that came with your computer.
- Install Windows 7 onto your new drive
- It is *Extremely* important that you format your new hard drive the same way your old drive was setup. For example, if your old drive was MBR, format your new drive MBR. If the original drive was a GPT disk, format your new disk GPT. If you don't you will run into problems.
- It is *Critically* important that you Give the new install the Same computer name as the old install (original hard drive) had.
- Boot from the System media --or-- from the Windows Repair disc and walk through the wizard steps to Restore an Image
- This may take some time (took less than an hour for me but YMMV)
- Once restored, go back to the Windows Disk Management Console and Expand your drive to fill the any remaining empty space.
Once this finishes you should be able to boot from your new drive. The advantage of this approach is that you do NOT have to reinstall your programs and migrate your data. Everything is 'ready to go'. If you have comments on this process, please link them in the comments section below.