
How to install Bash 4.2 on HP-UX PA-Risc (PPA) and Itanium (IA)
How to install Bash 4.2 on HP-UX PPA and IA
As part of our QA Test case automation strategy we are updating all our NIX machines to Bash 4.2. Using Bash across all platforms allows us to maintain a single set of scripts, which is convenient considering the multiple thousands of tests we would like to automate.
This article will:
- Show where you can Download Bash + dependencies from HP
- Walk through an installation using swinstall
Notes:
- Bash (hpux.connect.org.uk)
- gettext (hpux.connect.org.uk)
- libiconv (hpux.connect.org.uk)
- termcap (hpux.connect.org.uk)
Part 1: Obtain the .depot packages, stage them on your HP-UX machine
Using the links listed above in the Notes section, download Bash, gettext, libiconv and termcap for your HP Platform (PA-RISC 2.0 or Itanium 2).
Using something like WinSCP, copy the .depot files over to the HP-UX server.
Part 2: Installing the .depot files
HP Provides a tool called swinstall to install .depot packages. This is a pseudo-GUI tool with windows / menus. It is driven entirely by keyboard commands, and I couldn't figure out an automated command to just install the package that did not require user intervention.
Note: I will walk through the complete install of the gettext dependency. Repeat the steps for each dependency before installing bash.
Install Order (This is what worked for me, YMMV):
- termcap
- libiconv
- gettext
- bash
Steps to install using HP's swinstall:
Run the following commands at the shell prompt:
- swinstall -s /full/path/to/depot_file
You will see something like this: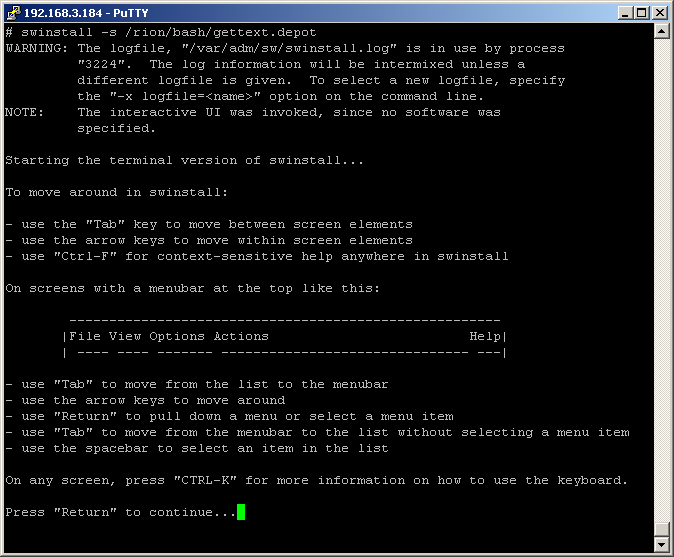
- Read the instructions to understand how to navigate in the swinstall environment. Then press Enter / Return. You will see the main swinstall screen:

- Press the spacebar key to highlight / select the .depot file (It should get highlighted in white
- Press the Tab key (This should activate the menu bar area)
- Press the a key. You should see a drop-down menu with Installation Actions that you can pick from:
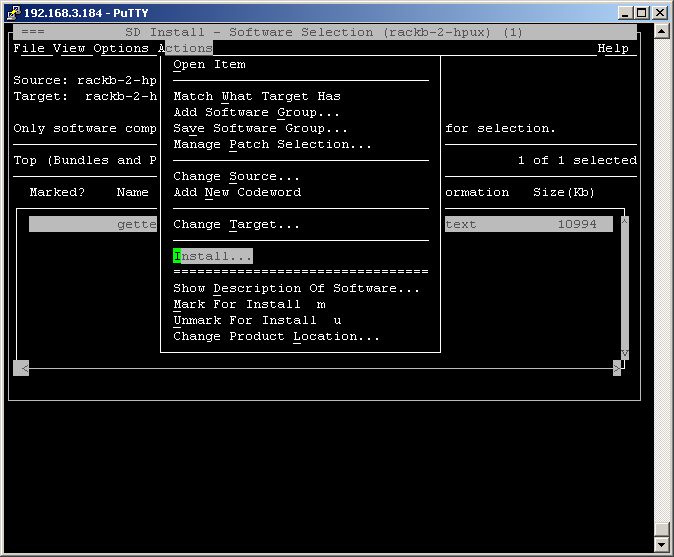
- Select Install... from the list and press Enter/Return. You should see a screen like this:
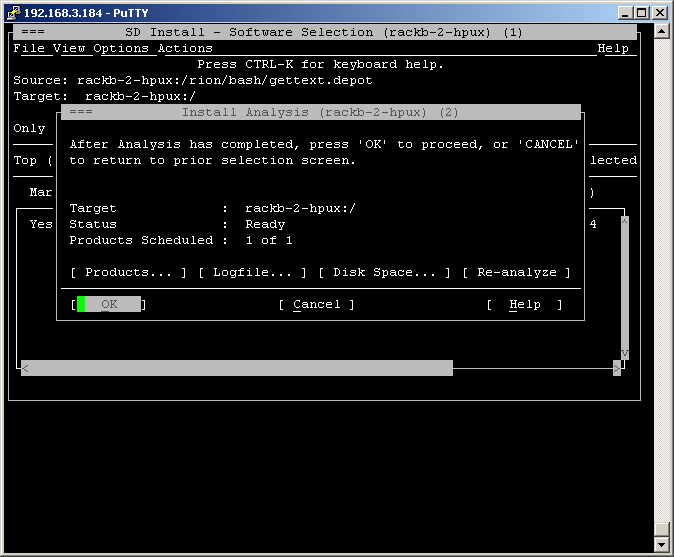
- Tab over to the OK button and press Enter/Return. You will see an Install Window which will show you the status of the installation:
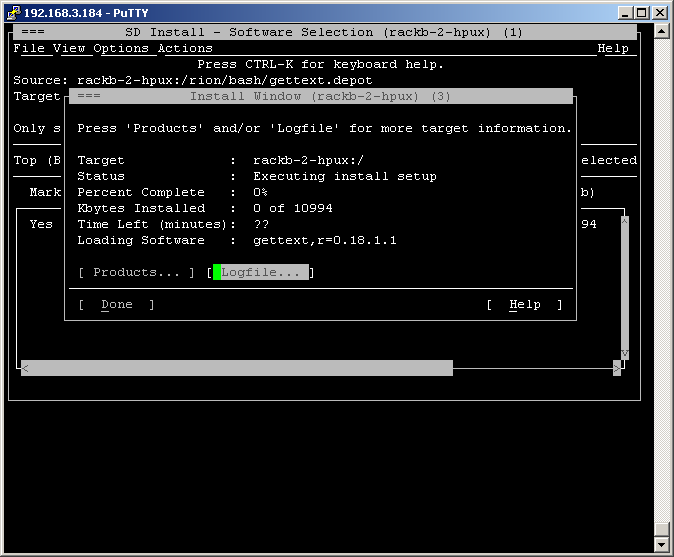
- Once the install finishes, the Done button becomes available. Tab over to it and press Enter/Return. This should take you back to the Main Screen (See the second screenshot from the top)
- Press the Tab key to get to the menu bar at the top and selec the File menu by pressing Spacebar. Select the Exit menu option to leave swinstall.
Note: This installs bash to /usr/local/bin
After installation, I ran the following commands to have bash show up in the more regular location (/bin/bash):
- ln /usr/local/bin/bash bash.link
- mv bash.link /bin
- mv /bin/bash.link /bin/bash
This operation will need to be done for each of the dependencies before being done for Bash itself. If anyone knows a better way to do this, please leave a comment.