
Develop Playbook applications using WebWorks Tablet OS SDK + Ripple (Part 2)
In a previous article I explained how to get up and running using the Blackberry WebWorks SDK. Today I'd like to document what I did to get my first Playbook app (A regexraptor.net client) in a state ready for submission.
I'll cover:
- Porting an HTML/CSS/Javascript app
- Implementing a splash-screen and icon
- Building a .bar file using the Ripple Emulator
IMPORTANT NOTE: Do not submit an unsigned app to the Blackberry App world. This will cause you problems when you want to submit a signed version later on. The App World does not accept unsigned applications.
Update: Article #3 shows how to sign your webworks app.
Update 2: I've added a 4th section to this article detailing how to debug your app on the Playbook Simulator (VMDK)
Notes:
- blackberry.system API (bdsc.blackberry.com)
- Configuring your Application (docs.blackberry.com)
- Thread with icon xml example (supportforums.blackberry.com)
- Thread explaining hasDataCoverage() method (supportforums.blackberry.com)
- Packaging your app (bdsc.webapps.blackberry.com)
- Playbook Simulator (bdsc.webapps.blackberry.com)
- App world submissions must be signed. Otherwise your app will not get approved
I decided to make an "App" version of my RegexRaptor website (Discontinued 2018). It seemed like a good way to get familiar with the process of creating a WebWorks app and even better way of getting a free Playbook. The following steps document what I had to do before I could submit my app to the RIM / Blackberry App World site.
This article assumes you have your Dev environment setup. If you have questions see this previous article on the topic.
Part 1: Port Your HTML/CSS/Javascript
- Copy the web app files to your local dev machine. They need to go in a folder that is made available by your local web server. In my case I picked the Apache webserver, so my files were copied to C:\Program Files (x86)\Apache Software Foundation\Apache2.2\htdocs\RegexRaptor. Here is what my folder looks like:
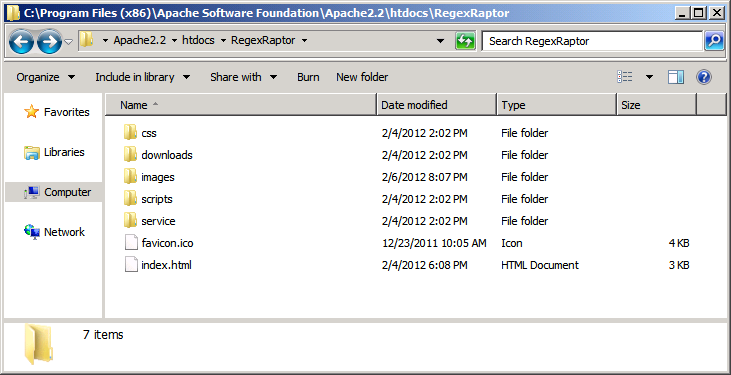
I just grabbed all the source files for the website and dropped them here
- Open the Ripple emulator and browse to your app:
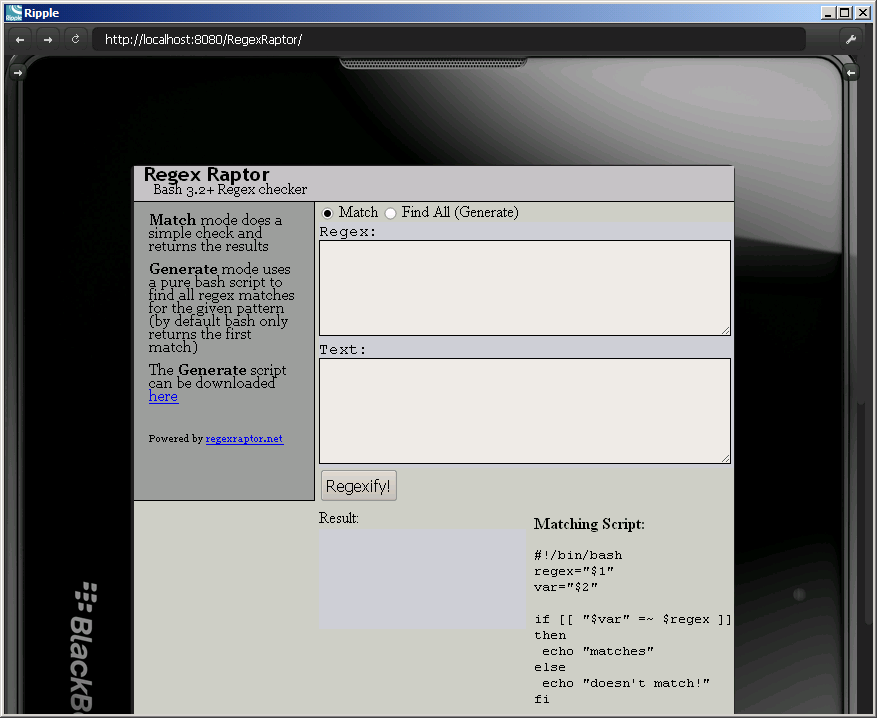
As I used port 8080 my URL looks like: http://localhost:8080/RegexRaptor
Fortunately, I didn't run into any errors loading the app. It worked great! - As the website loaded correctly, I only needed to account for a couple of things:
- Javascript webservice calls should be pointing to a good "public" API
- Internet connectivity is not a given on the Playbook
The webservice call change was pretty straightforward. I just edited my javascript to point to the proper URLs for the webservices. If you developed the site in the first place this is an easy step (assuming you are calling webservices in your app)
To account for Internet connectivity I configured the Ripple emulator to simulate a no-network scenario. This can be done by un-checking the "Has Data Coverage" check-box:
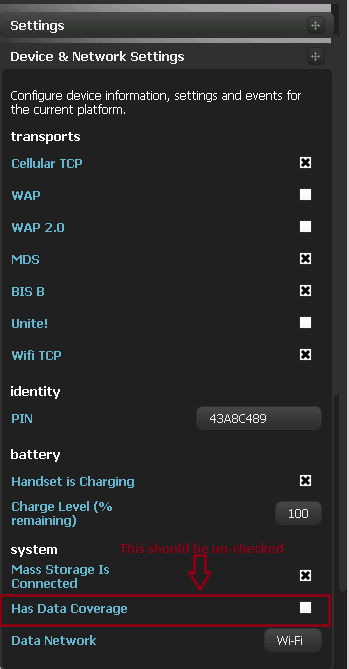
With Data turned off, my app didn't appear to work at all. As it was a web-app, I didn't worry about network connectivity (If you can get to the site you can use it). Since Blackberry doesn't have a guaranteed network connection I needed to add some code to display a message to the user when networking is not available.
To display the message I used the blackberry.system.hasDataCoverage() method. This allows me to quickly determine the network connection status and throw a mesage back to the user if there is an issue. Here is a way you can implement the hasDataCoverage() method (jquery):
if(!blackberry.system.hasDataCoverage())
{
$('#regex_result').html("No Data Connection. Please connect to the internet and try again.")
return;
}
This will show a message and return an error without attempting to poll the webservice.
Part 2: config.xml (Splash screen and Icon)
Playbook apps need a config.xml file to be present in order for the app conversion to be successful. This file includes information like App name, Application root, Splash screen, Icon, etc...
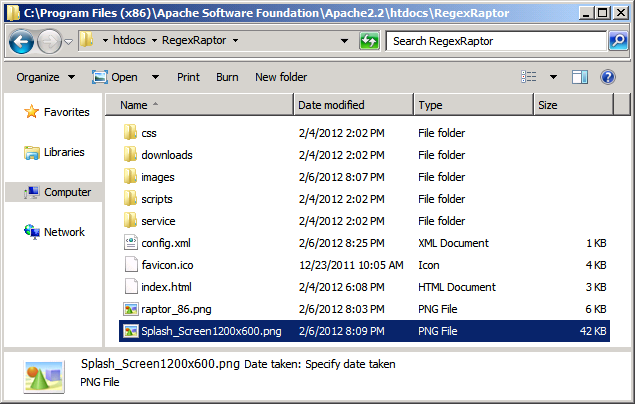
Be sure to prepare an Icon of size 86x86 pixels and a Splash-screen of size 1200x674 (This size worked for me). They will be referenced in the config.xml file and used during the build process.
While RIM provides a sample config.xml, it fails to note how to implement 2 important features: the Splash Screen and the Icon. Without these the app will have a sub-par user experience.
Here is my config.xml for the RegexRaptor application (details below):
< ?xml version="1.0" encoding="utf-8"?>
< widget xmlns="http://www.w3.org/ns/widgets"
xmlns:rim="http://www.blackberry.com/ns/widgets"
version="1.0.0">
< icon src="jsRegex_86.png"/>
< name>Regex Raptorname>
< description>Regex: Bash Style!description>
< author>Rubion Softwareauthor>
< content src="index.html"/>
< feature id="blackberry.app"/>
< feature id="blackberry.system" version="1.0.0"/>
< access uri="http://regexraptor.net" subdomains="true">
< feature id="blackberry.app.event" required="true" version="1.0.0"/>
< /access>
< splashscreen>Regex_splashscreen_1024_600.png
< rim:loadingScreen backgroundImage="Regex_splashscreen_1024_600.png" onFirstLaunch="true" />
widget>
NOTE: Remove the spaces after the opening symbol ( < ). I have to put them in or concrete5 will try to parse the content rather than display it.
NOTE 2: The above XML has been updated to include additional XML that is required for the app to work in the VMWare Player based Playbook Simulator.
Here's a break-down of the file for reference:
- < ?xml version="1.0" encoding="utf-8"?> - This indicates the file is of type XML
- xmlns:rim="http://www.blackberry.com/ns/widgets"
version="1.0.0"> - Indicates the blackberry namespace
- < icon src="jsRegex_86.png"/> - Path to the 86x86 icon file
- < name>Regex Raptorname> - Name of app as user sees it
- < description>Regex: Bash Style!description> - Description of your app
- < author>Rubion Softwareauthor> - Who wrote the app
- < content src="index.html"/> - Entry point for the app
- <feature id="blackberry.app"/> - Features the app uses
- < feature id="blackberry.system" version="1.0.0"/> - Lets me use hasDataCoverage()
- < access uri="http://regexraptor.net" subdomains="true">
< feature id="blackberry.app.event" required="true" version="1.0.0"/>
< /access>
... All the access uri stuff does is allow my app to communicate with the webservices. Apparently this needs to be set in order for it to work in the Playbook Simulator and by extension the device itself. - < splashscreen>Regex_splashscreen_1024_600.png
< rim:loadingScreen backgroundImage="Regex_splashscreen_1024_600.png" onFirstLaunch="true" /> - Splash / loading screen file - widget> - Closes off this app / widget
Part 3: Build your App using Ripple
At this point we should be ready to build the app. Make sure you save all your working files and take a backup of the working directory (Just in case) before continuing.
To build:
- Refresh / reload your app in the Ripple emulator

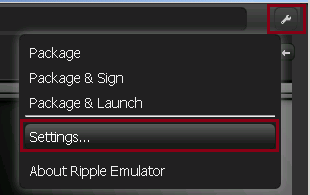
- Click on the Wrench Icon and select the Settings... option
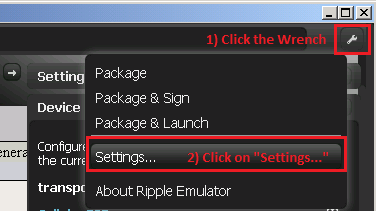
- On the Settings screen, be sure to fill out all the Build options
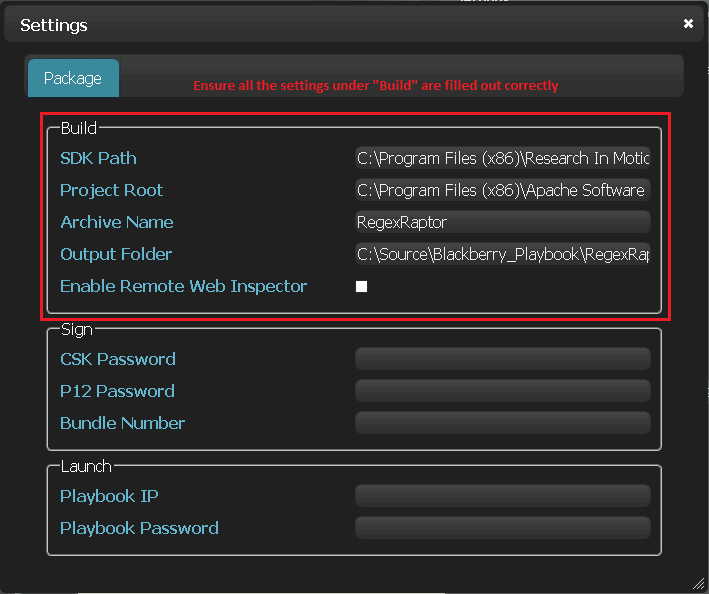
- SDK Path should point to your WebWorks SDK. In my case the path was: C:\Program Files (x86)\Research In Motion\BlackBerry WebWorks SDK for TabletOS 2.2.0.5
- Project Root should point to the web server directory where your working copy is. In my case this was: C:\Program Files (x86)\Apache Software Foundation\Apache2.2\htdocs\RegexRaptor
- Archive Name is the name you want the resulting .bar file to have
- Output Folder is where you want the build files to go. I picked a location under my C:\Source folder (personal convention)
- When the Settings are to your satisfaction, click the "X" to get back to the main Ripple screen.
- Click on the Wrench Icon and select the Package option.
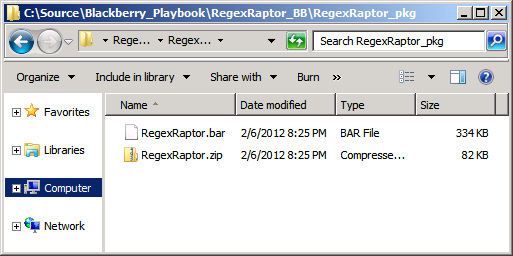
If all has gone well, you should see 2 files in your Output Folder: a .zip and a .bar file. It is the .bar file that you want to submit to RIM's Blackberry App World.
My build results:
I would recommend using 7-zip to decompress the .bar file and look inside the air folder to make sure your config.xml, splash-screen and icon are all present before submitting to RIM. I had to make an updated submission when I found that I was missing my icon files.
NOTE: Be sure to sign your app before submitting to RIM / Blackberry App world! They will be rejected otherwise
Note 2: Be sure to test your app in the REAL Playbook emulator before submitting. I found several bugs that were not picked up by Ripple
Here's a sneak-peek inside a .bar file's air directory:

Part 4: Testing your App using the Playbook Simulator
Just using Ripple to test your app is a recipe for disaster. The approval process for my app got delayed by a week because I only tested in Ripple and did not sign the .bar file.
There are a few things that need to be Installed & started:
- Download & Install VMWare Player (This may require a VMWare login)
... If I remember correctly, this will require you to reboot. Save any important data before continuing! I forgot to save my fat-fingered Code signing password and had to build a Password Recovery app to find it again.
- Download & Install the Blackberry Playbook Simulator VMDK
... This should place a number of files (including the VMX and VMDK files) in your C:\Users\USERNAME\Documents\Virtual Machines\BlackBeryPlayBookSimulator-2.0.0 Folder
- Open VMWare Player and select Open a Virtual Machine
- Browse to the BlackBerryPlayBookSimulator.vmx file in the location specified in Step 2 above
This should start the Playbook emulator
Once you have the above going you will need to Configure the Playbook's password, Set the playbook to allow remote debugging, grab the Dev IP Address and then configure Ripple with the information.
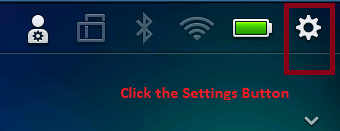
Configuring the Playbook:
- Click on the Settings button
- Select the Security option and click on Password
...Set the password to what you like (Defaults to playbook)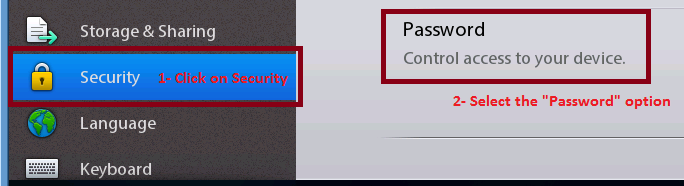
- Go back to the "home" screen and click the Person Icon to get the IP Address
... Record this for later use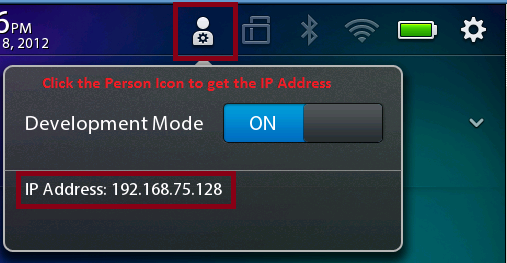
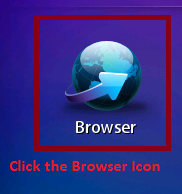
- Open the Browser
- Click on the Window button then on Settings
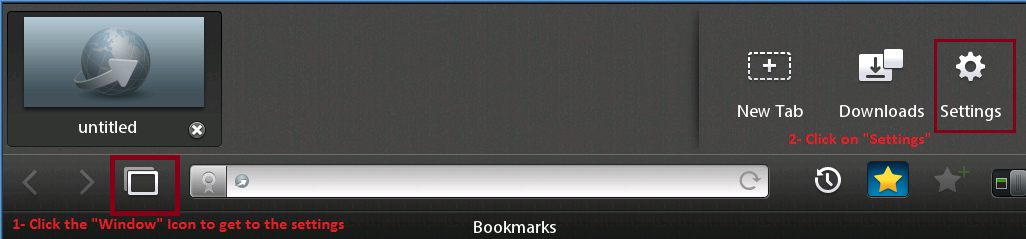
- Select Privacy & Security then Enable Web Inspector
... You will be prompted for the device password set in step 2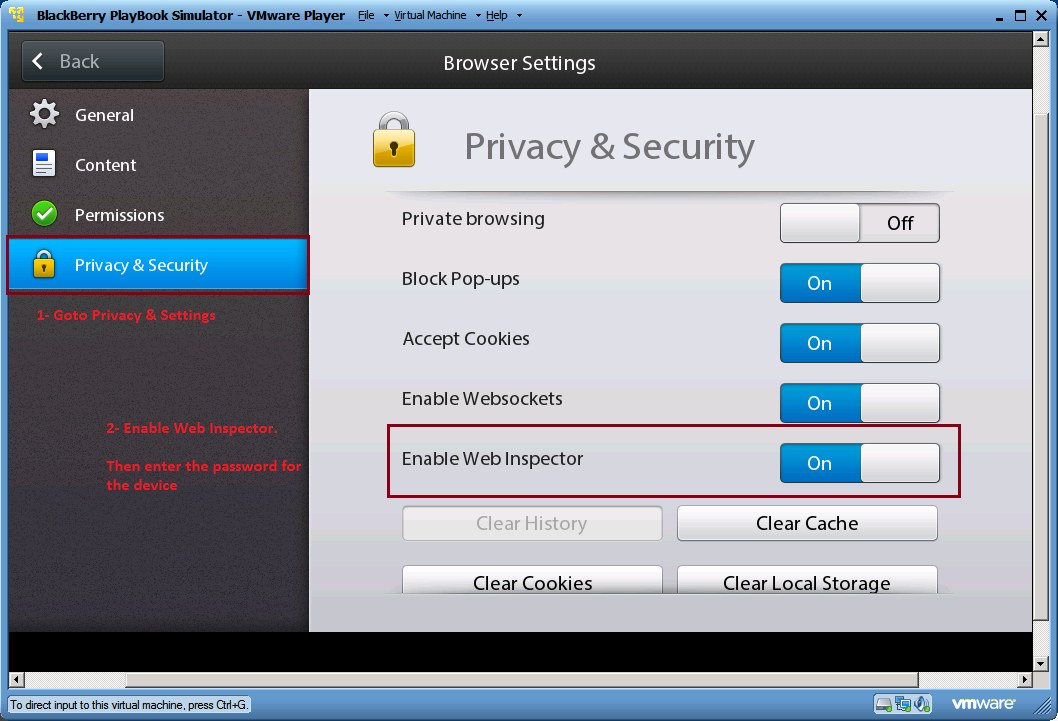
At this point the Playbook Simulator is setup & ready
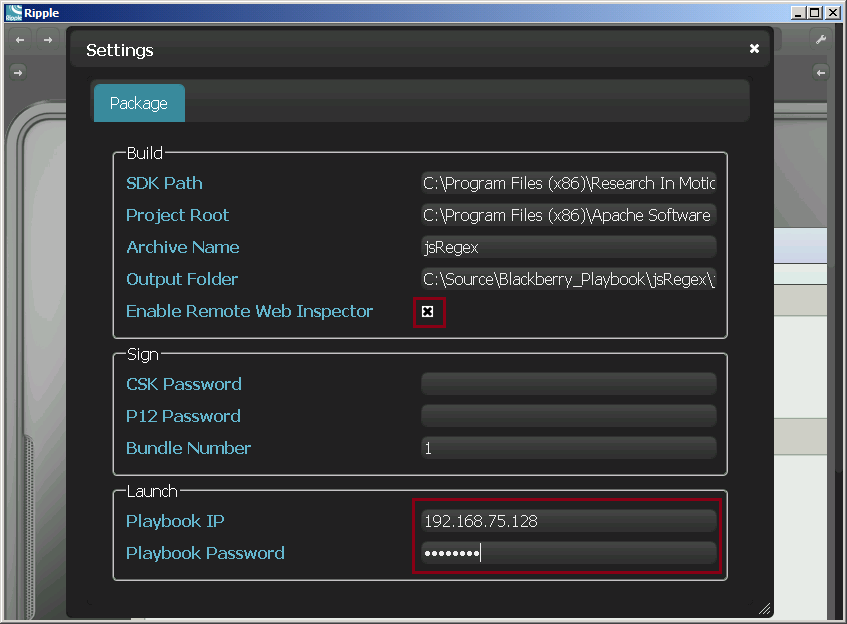
Configuring Ripple to allow Testing / Debugging on the Playbook Simulator:
- Open Ripple
- Open the Settings Page
- Enable the Web Inspector and enter the IP Address and Password to the Playbook Simulator
- Select the Wrench Icon and click on Package & Launch
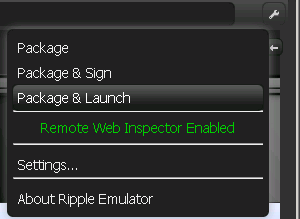
Your app should be running in the Playbook Simulator now.
Debugging your app
To debug your app:
- Open a Web Browser
- Navigate to http://IP.Address.Of.Playbook:1337 and click on your Application
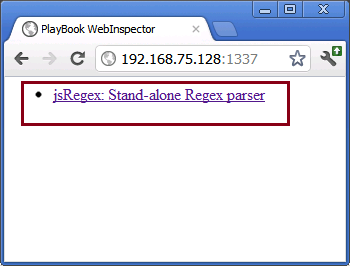
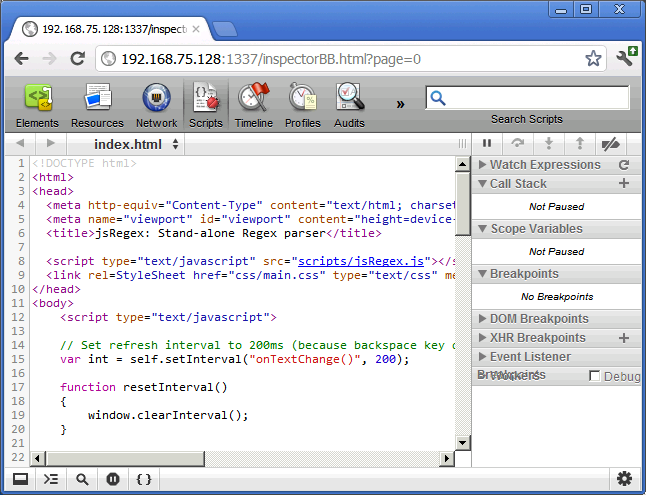
- You now have access to HTML/CSS/Javascript debugging tools. Use them wisely. :)
Update: Article 3 discusses code signing in preparation for submission to Blackberry App World